


Jenkins for Beginners: A Comprehensive Introduction to Continuous Integration Tools
Jenkins is an open-source automation tool that helps in building, testing, and deploying software projects. Its main purpose is to provide Continuous Integration and Continuous Deployment pipelines, which ultimately lead to shorter development release cycles and improved product quality. The tool can be used with any programming language and can run on multiple platforms, including Windows, Linux, and macOS.

Jenkins is an open-source automation tool that helps in building, testing, and deploying software projects. Its main purpose is to provide Continuous Integration and Continuous Deployment pipelines, which ultimately lead to shorter development release cycles and improved product quality. The tool can be used with any programming language and can run on multiple platforms, including Windows, Linux, and macOS.
According to the Jenkins website:
Jenkins, originally founded in 2006 as “Hudson”, is one of the leading automation servers available. Using an extensible, plugin-based architecture, developers have created hundreds of plugins to adapt Jenkins to a multitude of build, test, and deployment automation workloads. In 2015, Jenkins surpassed 100,000 known installations, making it the most widely deployed automation server.
Features of Jenkins
- Easy installation and configuration: Jenkins is a Java-based automation tool (Java is a prerequisite for installation) that runs on Windows, Mac OS, and Unix-like OS. It is self-contained and platform-agnostic.
- Available Plugins: With a vast collection of plugins available in the Update Center, Jenkins can seamlessly integrate with almost every tool in the continuous integration and continuous delivery toolchain.
- Continuous integration: Whenever changes are pushed to the repository, builds are triggered and tested automatically. This enables quick feedback on code quality and prevents integration issues.
- Continuous deployment: It simplifies application deployment and management across multiple servers or cloud platforms and helps to streamline the process.
- Extensive: Jenkins offers a plugin architecture that enables extensive customization and functionality options.
Jenkins Pipeline
A Jenkins pipeline is a set of plugins used to create recurring automated workflows that constitute CI/CD pipelines. It enables the definition of a comprehensive set of events that occur in the code lifecycle, from building to testing and deployment.
Jenkins Pipeline is defined using a file called the Jenkinsfile. It is implemented as code using the Groovy Domain-specific language. The Jenkinsfile can be edited in an editor or on the Jenkins instance configuration page.
Sample Jenkinsfile for Pipeline
pipeline {
    agent any
    stages {
        stage('Build') {
            steps {
                // compile code
// if successful, move build artifacts to the desired location
            }
        }
        stage('Test') {
            steps {
                // check if artifacts are present in the correct location
// load test data into the database
// execute the test case
// continue only if tests passed
            }
        }uio
        stage('Deploy') {
            steps {
                // Fetch tested code and deploy it to production
            }
        }
    }
}
Jenkins offers two types of syntax to create pipelines. They are:
- Scripted
- Declarative
Scripted Pipeline
The Scripted Pipeline is the original pipeline syntax for Jenkins, and it is based on the Groovy scripting language. In this syntax, the entire workflow is defined in a single file called a Jenkinsfile, which is written in Groovy and executed by the Jenkins Pipeline plugin. Although the Scripted Pipeline provides more flexibility and control over the workflow, it can be more complex and verbose than the Declarative Pipeline.
Example for scripted pipeline:
node {
    stage('Build') {
        // Build the application
        sh 'mvn clean install'
    }
    stage('Test') {
        // Run the tests
        sh 'mvn test'
    }
    stage('Deploy') {
        // Deploy the application
        sh 'deploy.sh'
    }
}
Declarative Pipeline
The Declarative Pipeline is a newer feature in Jenkins that offers a more organized and concise method of defining pipelines. It uses a Groovy-based DSL (Domain-Specific Language) for pipeline configuration, which is based on the Groovy programming language. The most significant advantage of the Declarative Pipeline is its readability and simplicity, as it is intended to be more intuitive and less wordy than the Scripted Pipeline. Declarative Pipeline is a simplified and opinionated syntax on top of Jenkins Pipeline.
Example for declarative pipeline:
pipeline {
    agent any
    stages {
        stage('Build') {
            steps {
                // Build the application
                sh 'mvn clean install'
            }
        }
        stage('Test') {
            steps {
                // Run the tests
                sh 'mvn test'
            }
        }
        stage('Deploy') {
            steps {
                // Deploy the application
                sh 'deploy.sh'
            }
        }
    }
}
Jenkins Distributed Architecture
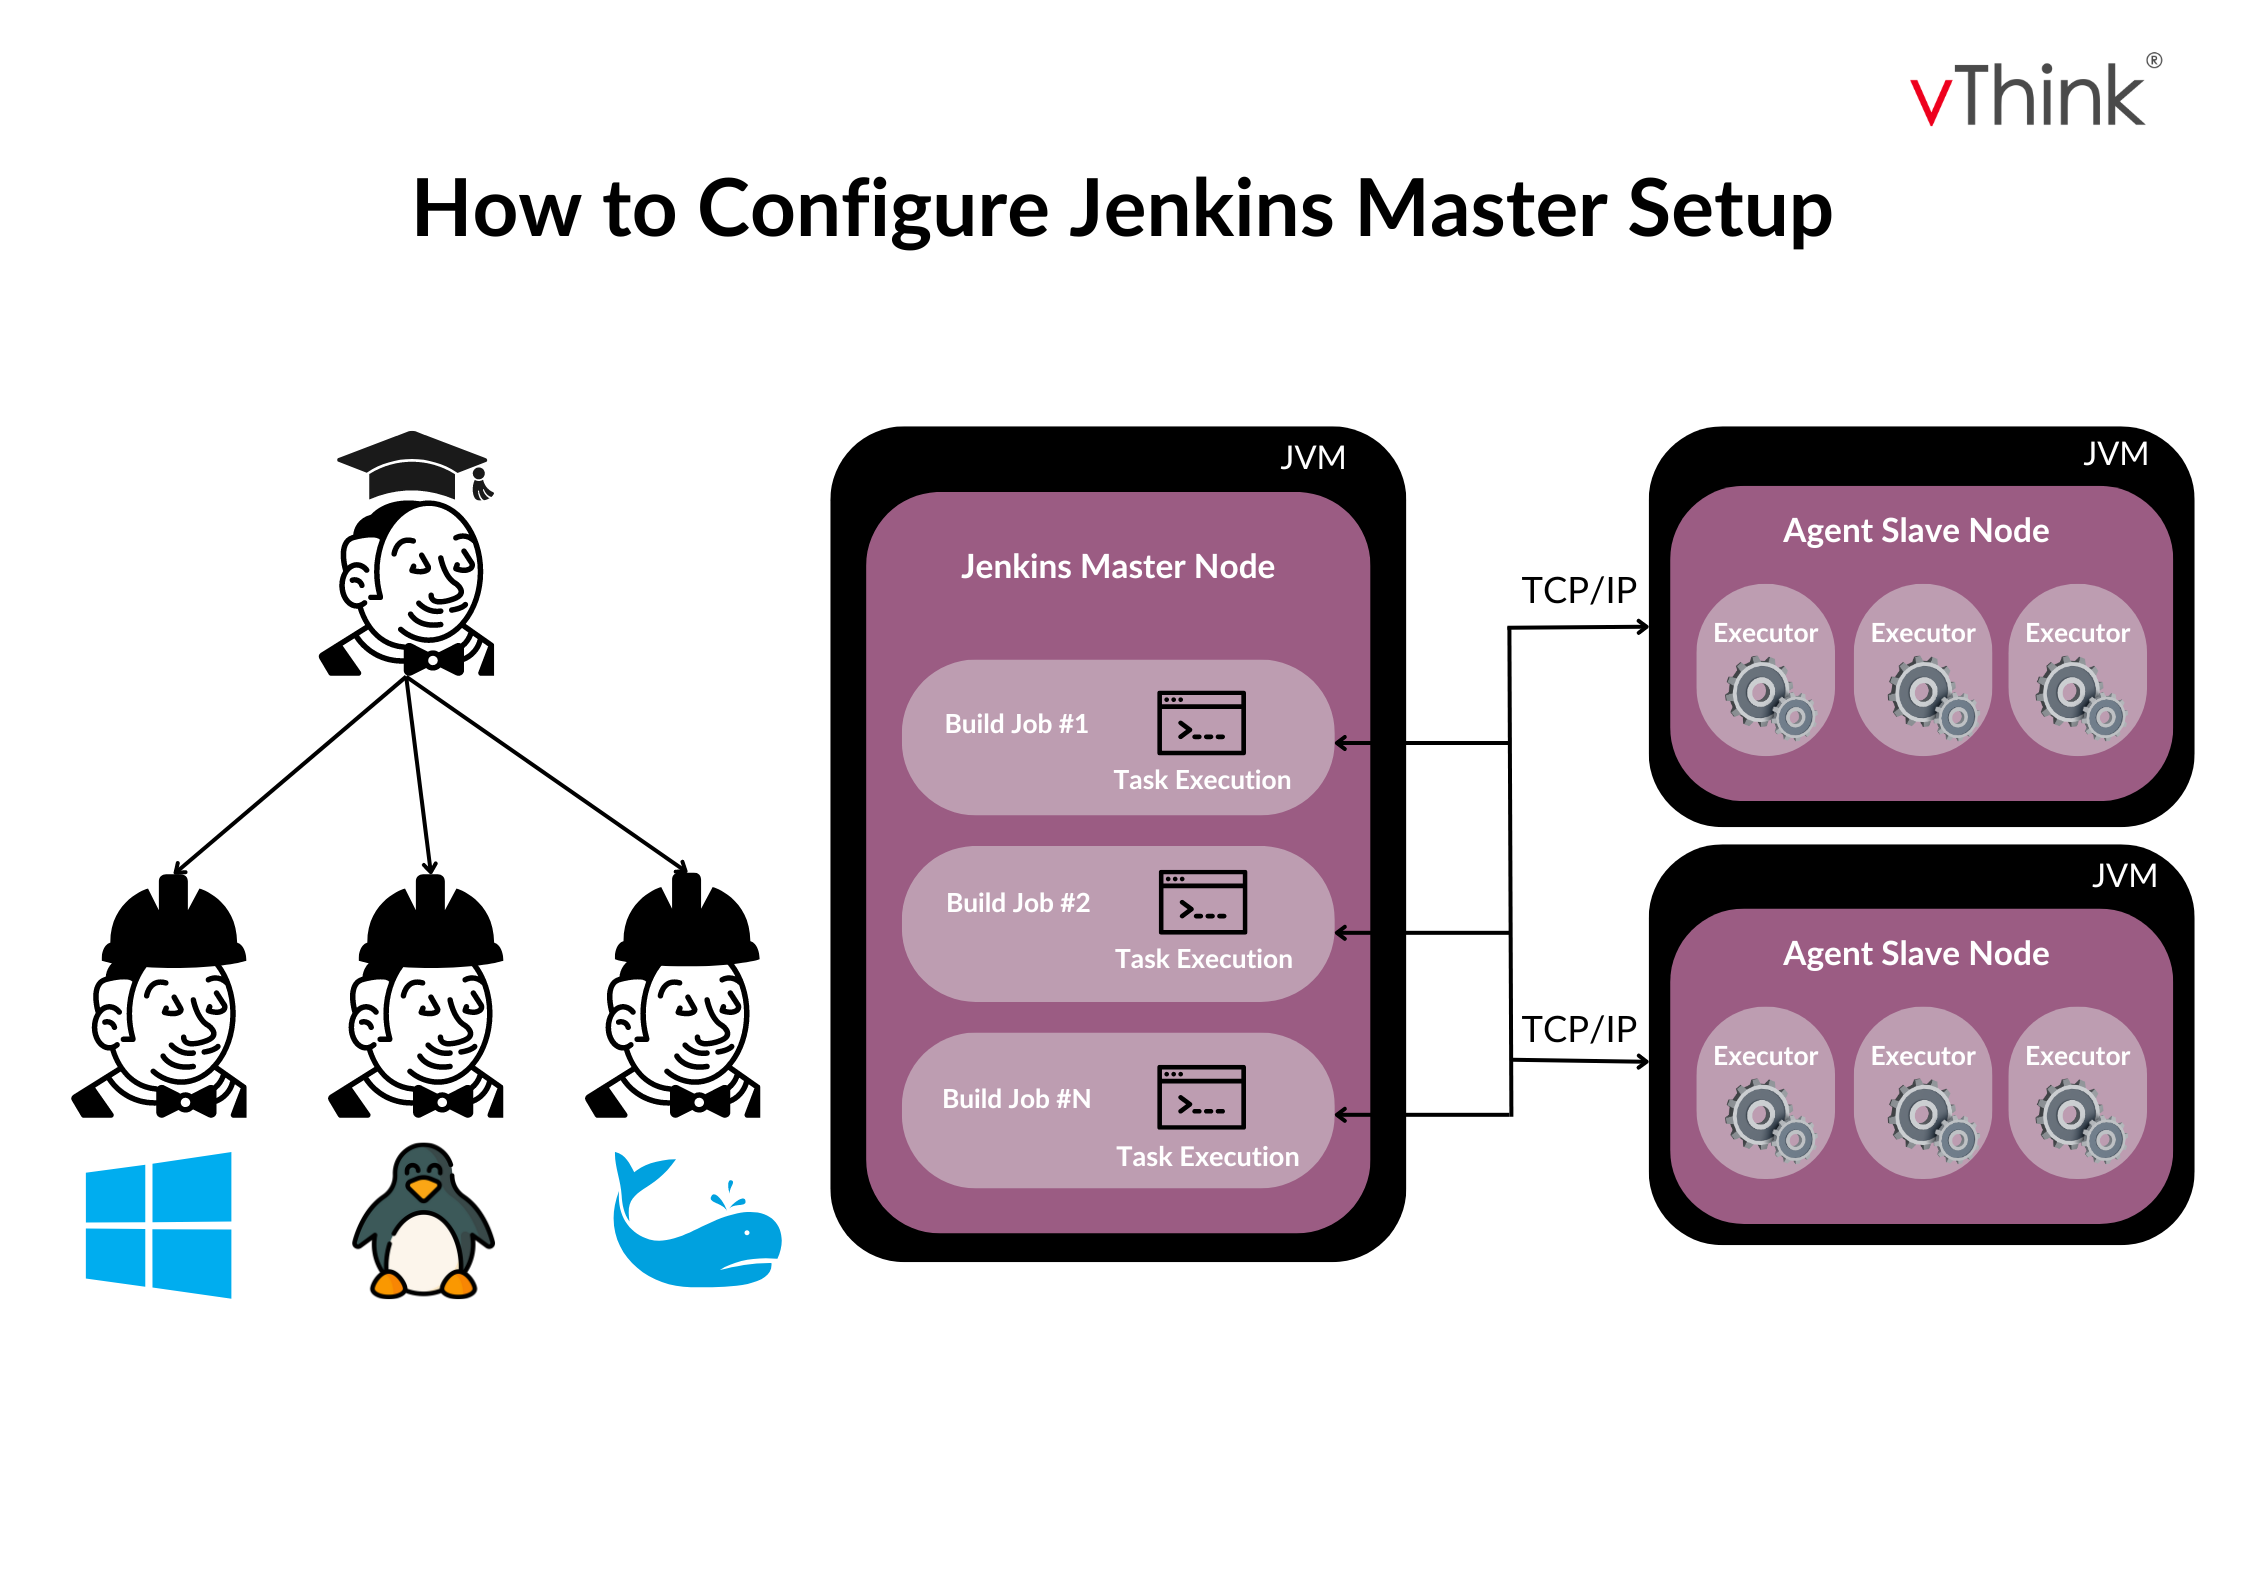
Jenkins employs a Master-Slave architecture for managing distributed builds, where the Master and Slave communicate via TCP/IP protocol.
Master
The main Jenkins server hosted is Master. The Jenkins Master Server is the primary control server responsible for arranging the pipeline's defined workflow. The jobs of this Master are as follows:
- Scheduling jobs
- Sending builds to slaves to execute the job
- Keeping track of the slaves’ states (online/offline)
- Can also directly execute build jobs
Slave
"A Slave" refers to a Java executable that can be executed on a remote machine like Linux or Windows VM.
Characteristics of the slave are:
- It hears requests from the Jenkins Master instance.
- Its job is to execute build jobs conveyed by the Master.
How to Setup Jenkins Master and Slave
- Go to the Manage Jenkins section in the dashboard. In that, click on the Manage node and cloud.
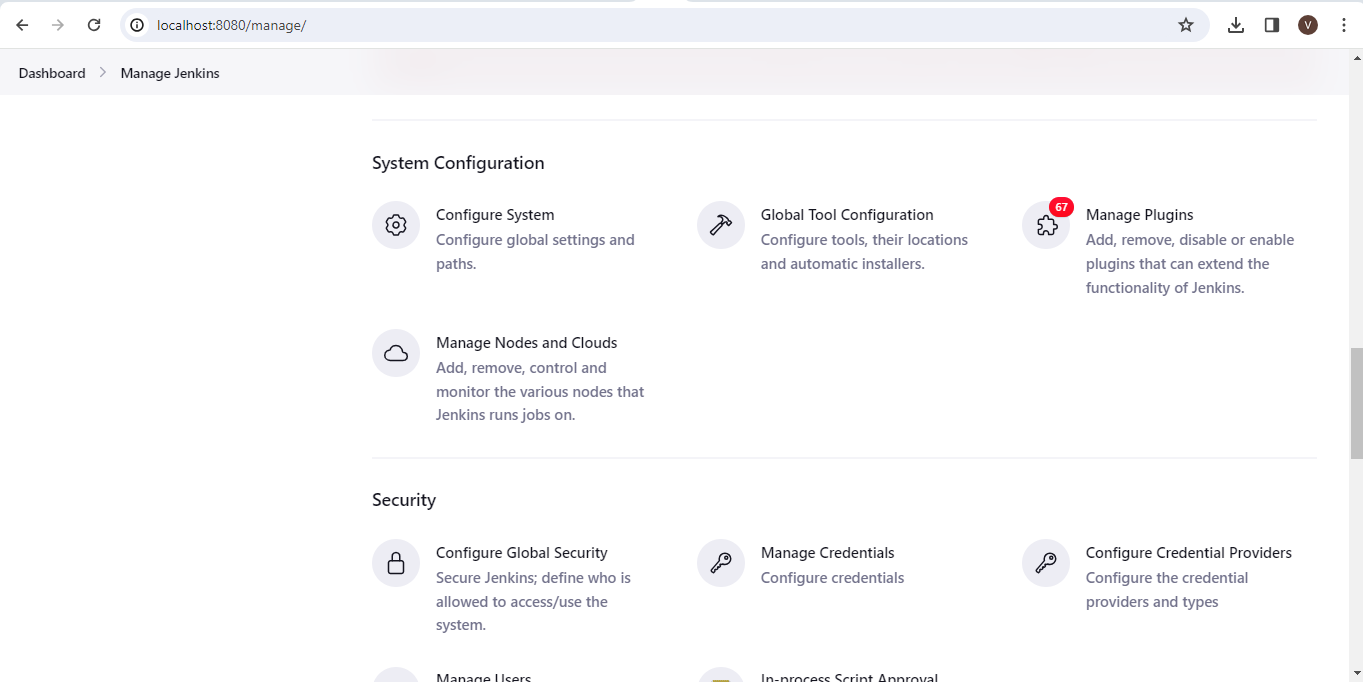
- In that, create a new node and configure slave node details.

Types of Projects in Jenkins
- Freestyle Project: This is the most basic project type in Jenkins. Users can define build steps and configurations based on their requirements, making it flexible and suitable for simple and custom-build processes.
- Pipeline Project: A pipeline is a flexible and scalable approach to define the build, test, and deployment workflows in the form of code. It utilizes a domain-specific language (DSL) or a declarative syntax to describe the complete build pipeline, comprising stages, steps, and conditions. Pipeline projects are exceptionally adaptable and suitable for intricate build processes and continuous delivery workflows.
- Multibranch Pipeline: This project type is beneficial when you possess multiple branches in your source code repository, and you seek to construct and examine each branch separately. Jenkins identifies new branches automatically and produces build pipelines to monitor their progress, allowing you to keep track of the status of various branches.
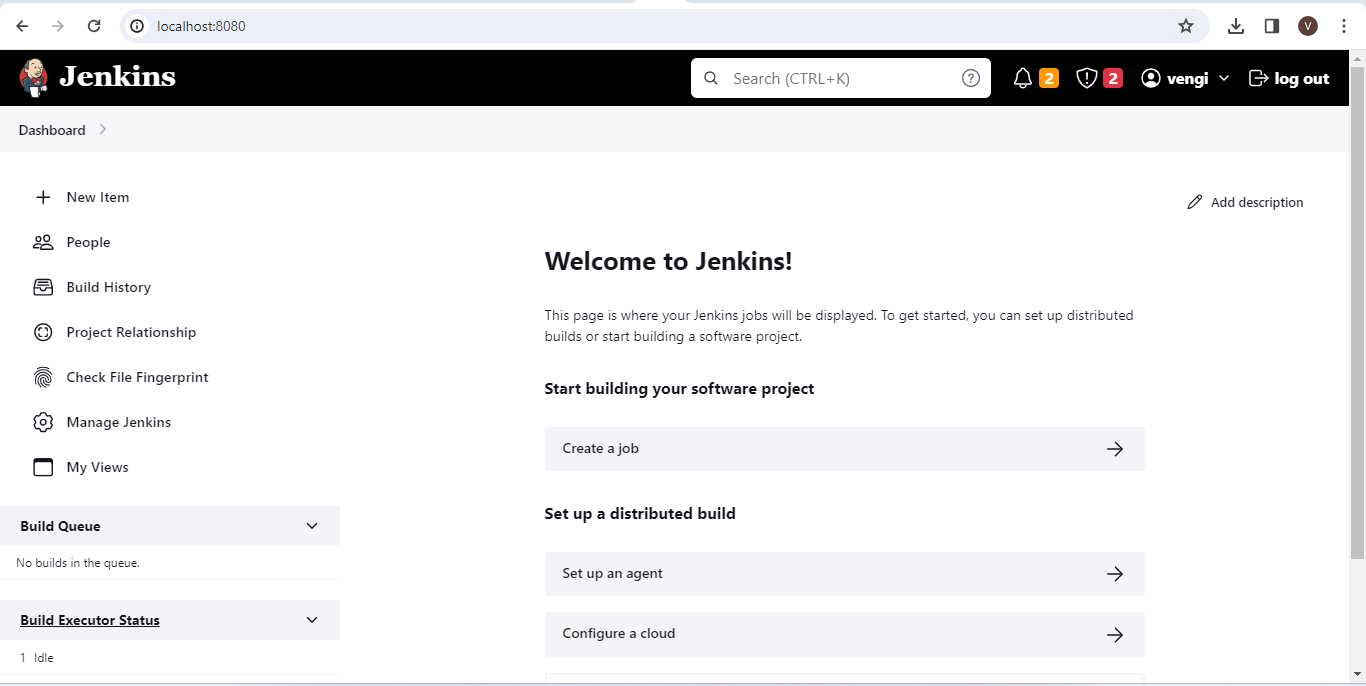
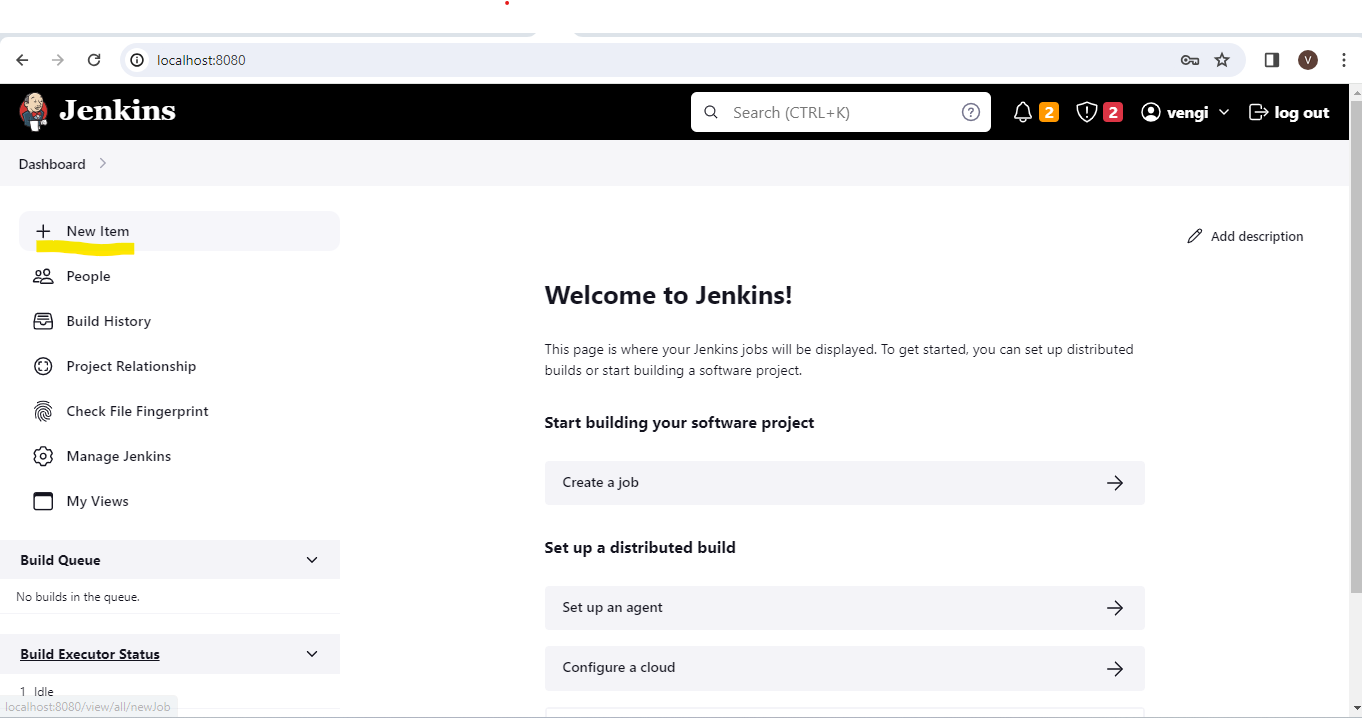
How to Create a New Project
- Go to the dashboard and click the new item.
- Enter the new project name in the item name and select the project based on your work.
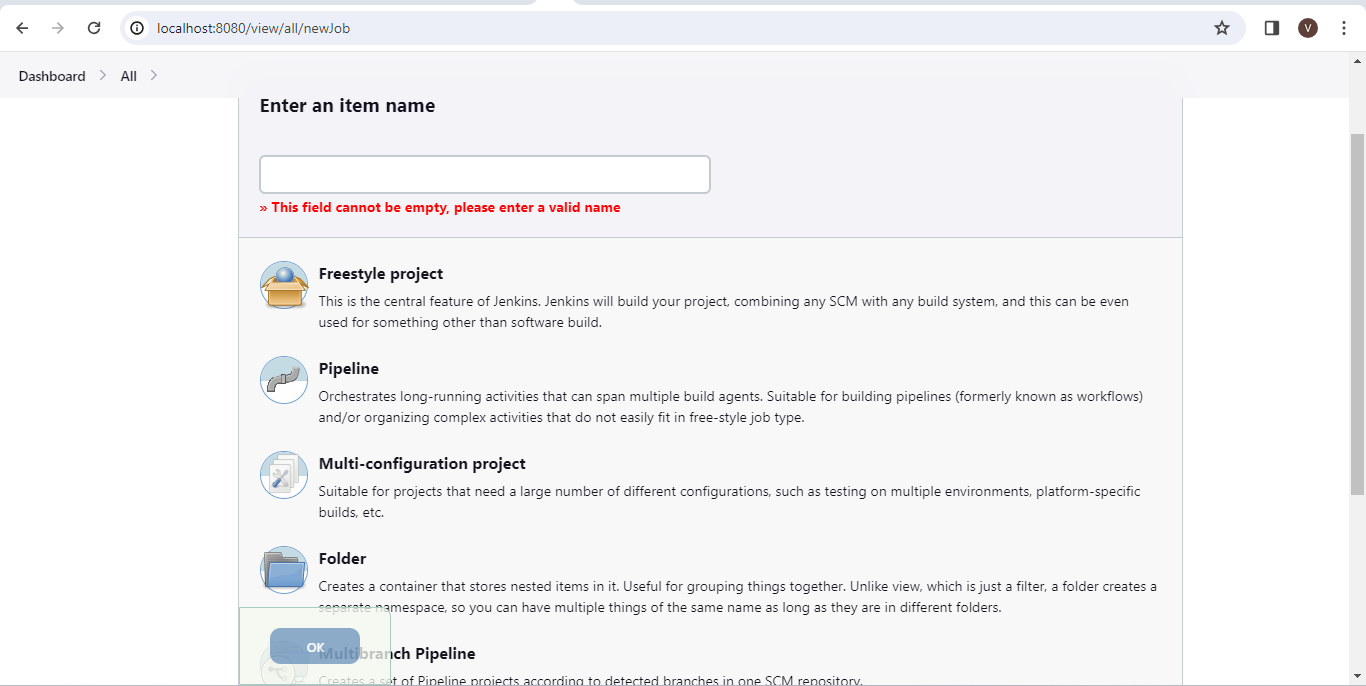
- In this case, we chose a pipeline project. Once you click “OK” after selecting the project, you can see the configuration part, like GitHub, etc., and the pipeline part that needs to run the project.

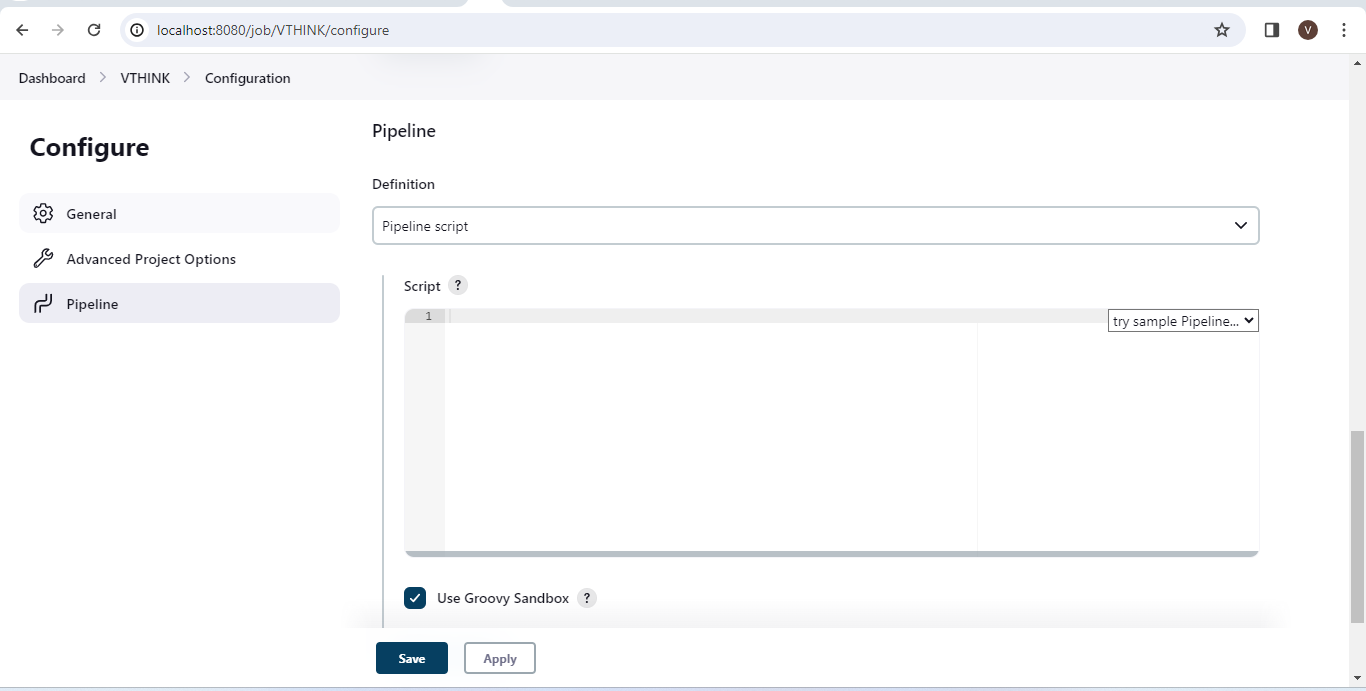
- In the pipeline project, we can see the “This project is parameterized” check box. Let’s learn about this.

Defining Build Parameter
A build parameter enables passing data into Jenkins jobs. It allows passing git branch names, secret credentials, hostnames, and ports.
In Jenkins, a parameterized build allows you to create flexible and customizable build jobs by defining parameters that can be passed when triggering a build.
By checking the box “This project is parameterized” on the General settings tab, any Jenkins job or pipeline can be parameterized.
NOTE: if you don’t have the Parameterized Build plugin installed in your Jenkins instance, you need to install it first. You can do this by going to “Manage Jenkins” => “Manage Plugins” => “Available” tab, searching for the “Parameterized Build” plugin, and installing it.
Types of Build Parameters
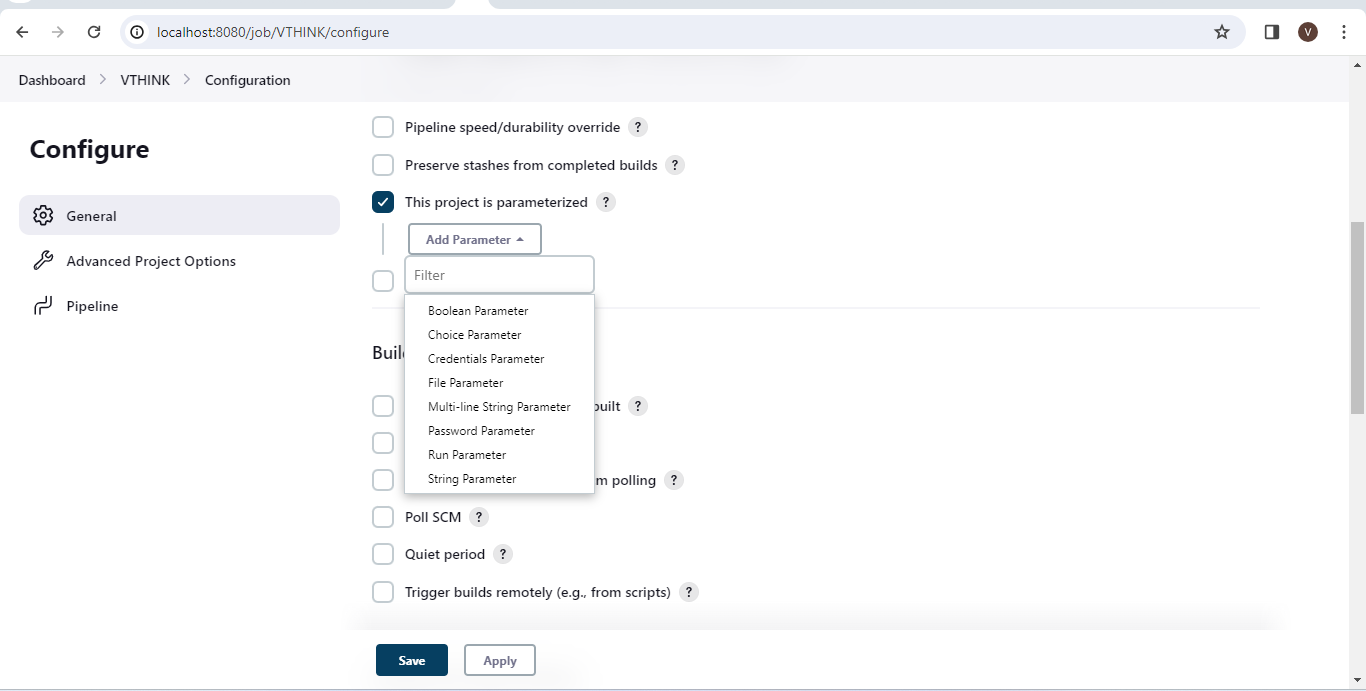
- String Parameter: Allows you to input a text string as a parameter.
- Boolean Parameter: Allows you to choose between true or false as a parameter.
- Choice Parameter: Provides a dropdown list of choices for a parameter.
- File Parameter: Allows you to specify a file as a parameter.
Let’s move on to the security part of Jenkins. They are:

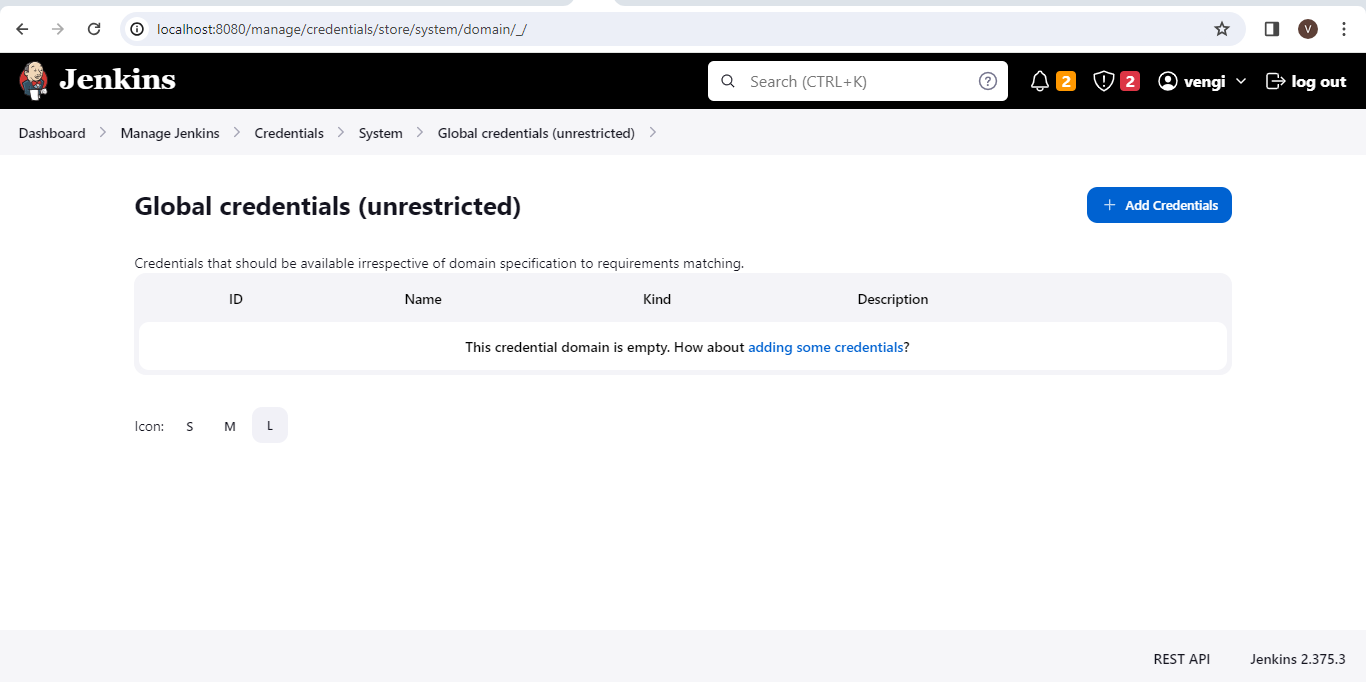
- Manage Credentials
When we create a project in Jenkins, we typically use a source code management system such as GitHub or Bitbucket where our development team pushes source code. While we can add git credentials and URLs while configuring the project, this is not considered a best practice. Instead of adding credentials in every project separately, we can add global credentials in the manage credentials section.

- Manage User
By default, when you create a user in Jenkins, they are granted access to almost everything. While you can create multiple users, you can only assign the same global roles and privileges to all of them. This can become a problem for large organizations where different users may require different access levels.
To allow for assigning different roles and privileges to users within Jenkins, you should install the Role Strategy Plugin.
Manage Jenkins => manage plugin => available => search “Role Strategy Plugin” => Install the plugin.
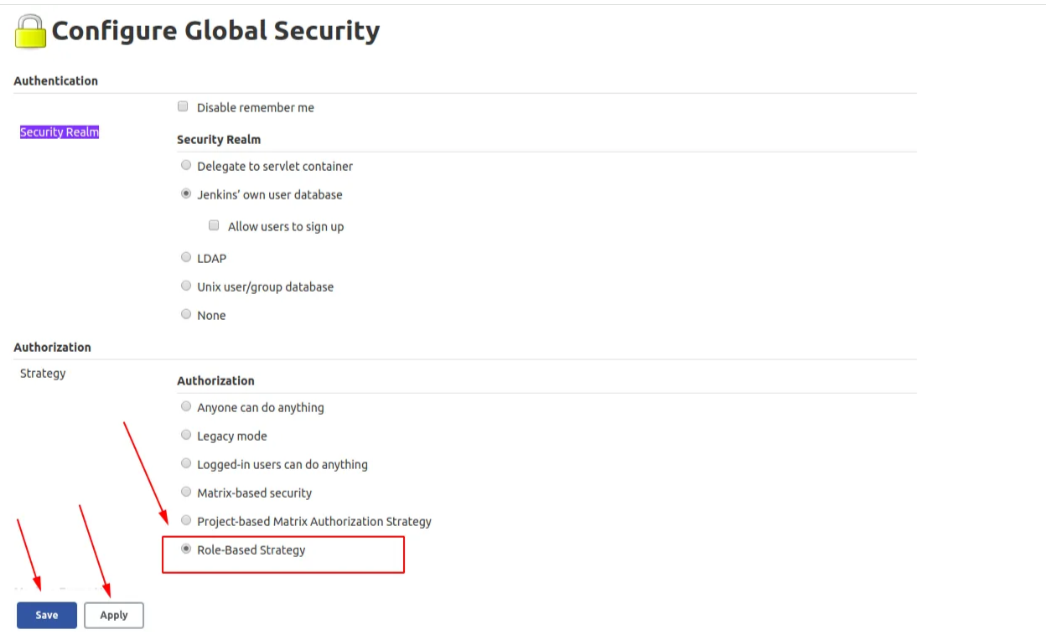
After successful installation, go to Manage Jenkins => Configure Global Security, scroll down to the Authorization section and select the Role-Based Strategy option, where you can refer to the screenshots below.
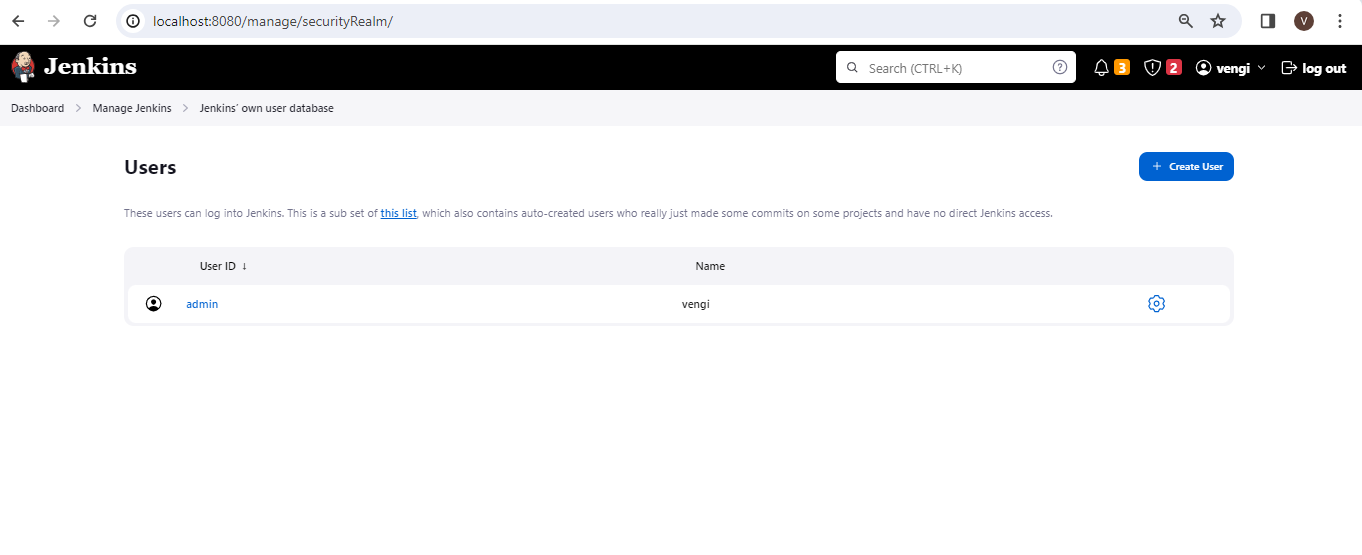
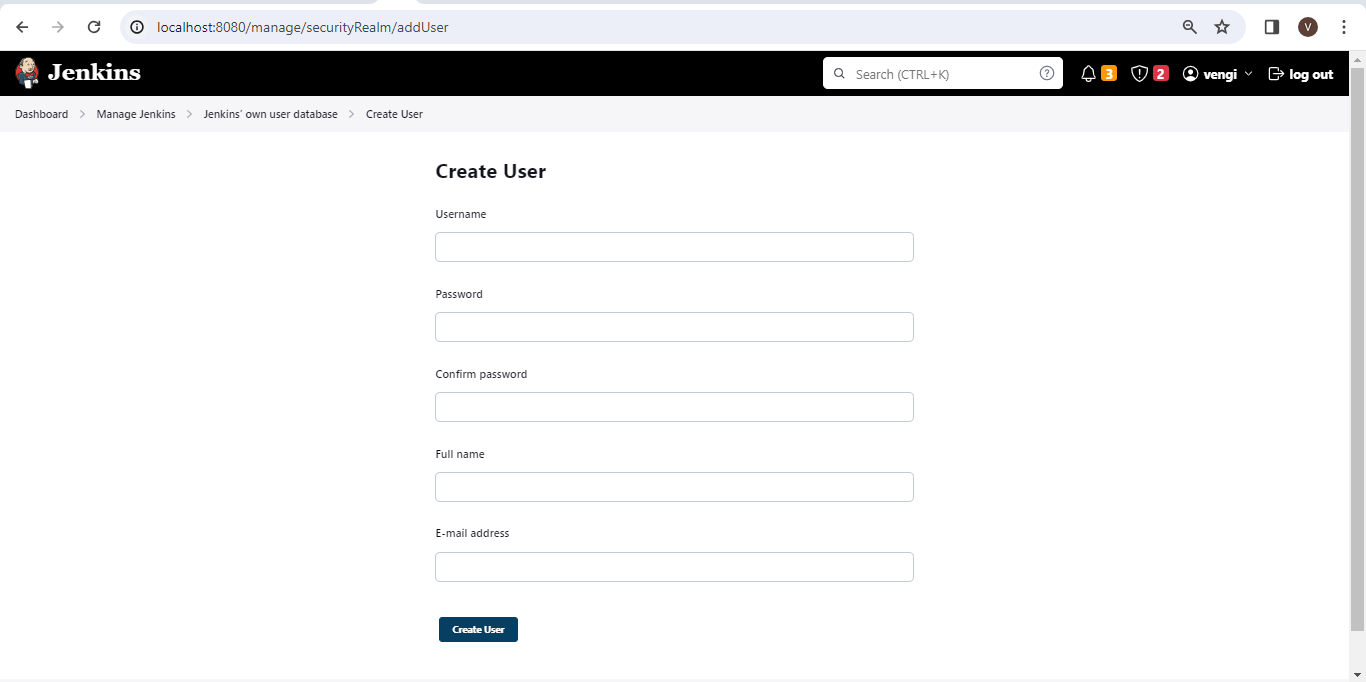
Once it is done, we need to create the user in the Manage user.
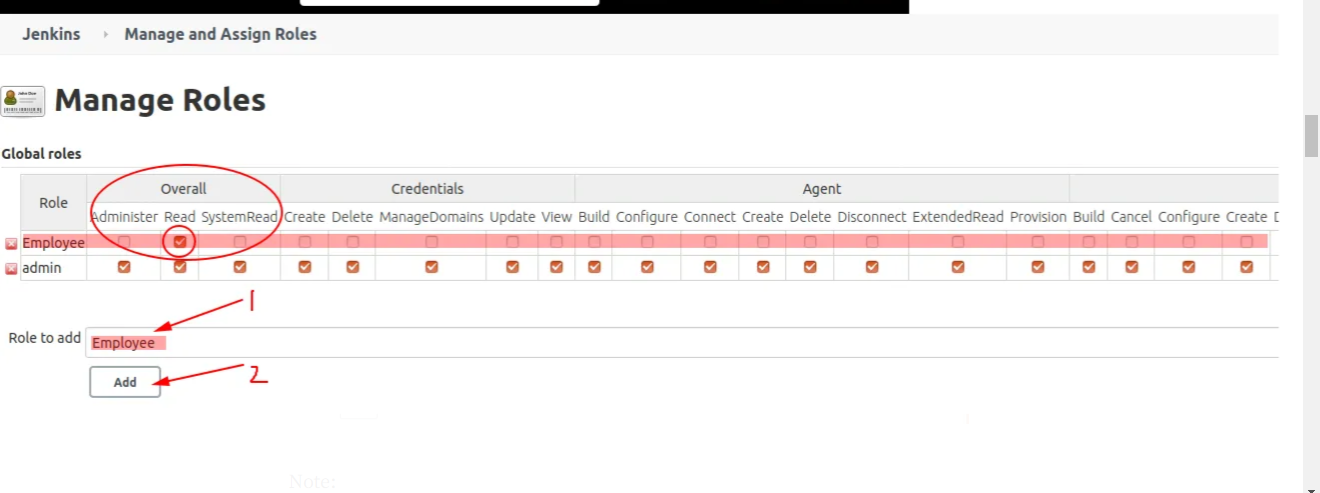
Once the user is created in Manage Jenkins, search for Manage and Assign Roles. Click that and select Manage Roles. Under the Manage Roles page, we see two sections, where one is the Global roles and the other is the Item roles. Now, let’s start with the Global roles. Under the Global roles section, add a role with the name Employee and assign Read access inside the Overall category.
Under the Item roles section, add a role and a pattern to the role, for the role to add we need to provide any role that is understandable with the project. In this case, we have created Test_DEVs, and for the pattern, we have provided the RE of the projects to be authorized to this user.

Again, go to Manage Jenkins => Manage and Assign Roles => Assign Roles
Under Global roles, provide the created username, i.e. test_user and click on the Add button, the user will be added to the Global roles table and select the checkbox under the Employee.

Under the Item roles, provide the created username, i.e., test_user, and click on the Add button. The user will be added to the Item roles table, and select the checkbox under the Test-DEVs in front of test_user.

Conclusion
Thank you for stepping into the Jenkins world for the first time! You really should have a fair knowledge of Jenkins by now: how to install it and construct your first automated build processes. Remember that Jenkins is a powerful tool that can be applied in all different tasks of continuous integration and delivery, starting from code development and testing and finishing with application distribution. As you learn more and more about Jenkins, try combining it with other tools that are taking part in your development flow. Try new plugins or set up more complicated pipelines.